This is Part 16 of the “Frontend Testing, Done Right” series. Browse the full series · Glossary
Ever had every test green while the screen was broken? Logic fine, one CSS rule collapsing the layout? Visual regression testing stores a reference screenshot (the baseline) and compares pixels, automatically catching “regressions only eyes can see.” It’s built into Playwright — one line to start — but there’s a knack to stable shots and an ambush called environment differences. All covered here.
Coming from a search? Fine — examples are self-contained, Playwright basics in the intro part.
Practice code: this part’s snapshot lives at the
step-16tag — includinge2e/visual.spec.tsand its committed baselines. You can also open it in StackBlitz.
After this article#
- What visual regression testing actually checks, and how it differs from unit and E2E
- Playwright snapshot comparison (
toHaveScreenshot) — whole page vs. single element, tuning tolerances - Tips for stable snapshots, and how to manage baselines
- The gains and costs of visual regression (environment trap included)
What is visual regression testing#
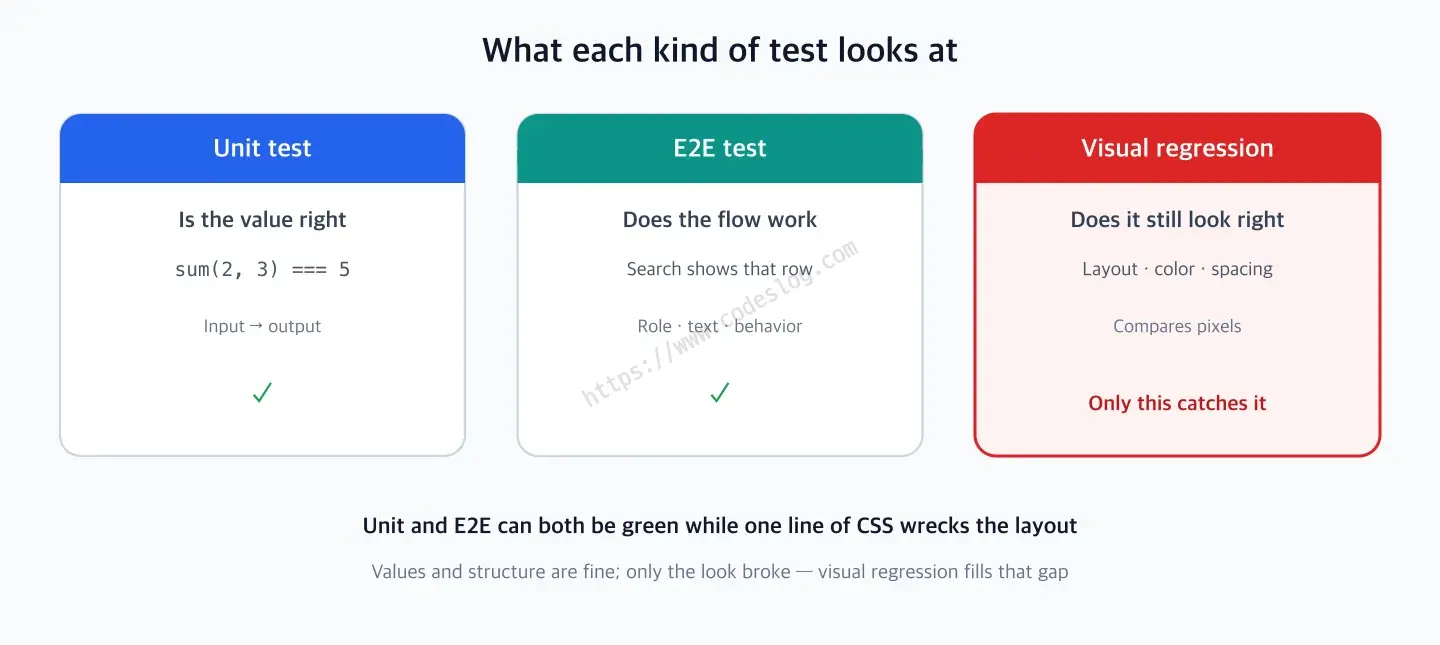
Every test we’ve built in this series so far looks at either a value (unit) or a flow and structure (E2E). Does pressing the button surface that row; does the function return 5. But there’s something both of them miss even when they’re green — what the screen actually looks like.
Say you change a CSS flex to block by mistake and the cards collapse into a vertical pile. The button is still a button with the same name, so E2E stays green; the values are untouched, so the unit tests stay green too. Meanwhile users get a wrecked layout. The values and the structure are right, and only the look is broken — that gap is where visual regression testing lives.
How it works is exactly what the name says. You take one screenshot and keep it as the reference — this reference image is called the baseline — and on every later run you compare the fresh screenshot against that baseline, pixel by pixel. However many pixels differ is the signal that the screen changed. The crucial part is that baselines get committed to the repository and shared with your team, like code, but that’s easier to talk about once we’ve taken one — so let’s shoot.
Playwright has this built in under the name toHaveScreenshot, so there’s no extra library to install. One line gets you started.
Snapshot comparison#
test('the dashboard layout holds', async ({ page }) => {
  await page.goto('/')
  await page.getByText('Alice Kim').waitFor()

  // first run: saves the baseline under this name / later runs: pixel comparison
  await expect(page).toHaveScreenshot('dashboard.png', {
    maxDiffPixelRatio: 0.01,   // allow up to 1% difference (font antialiasing etc.)
  })
})
One thing to know about the first run — it fails on purpose.
  ✘  1 [chromium] › e2e/visual.spec.ts:3:1 › keeps the dashboard layout (653ms)
    Error: A snapshot doesn't exist at .../visual.spec.ts-snapshots/
    dashboard-chromium-darwin.png, writing actual.
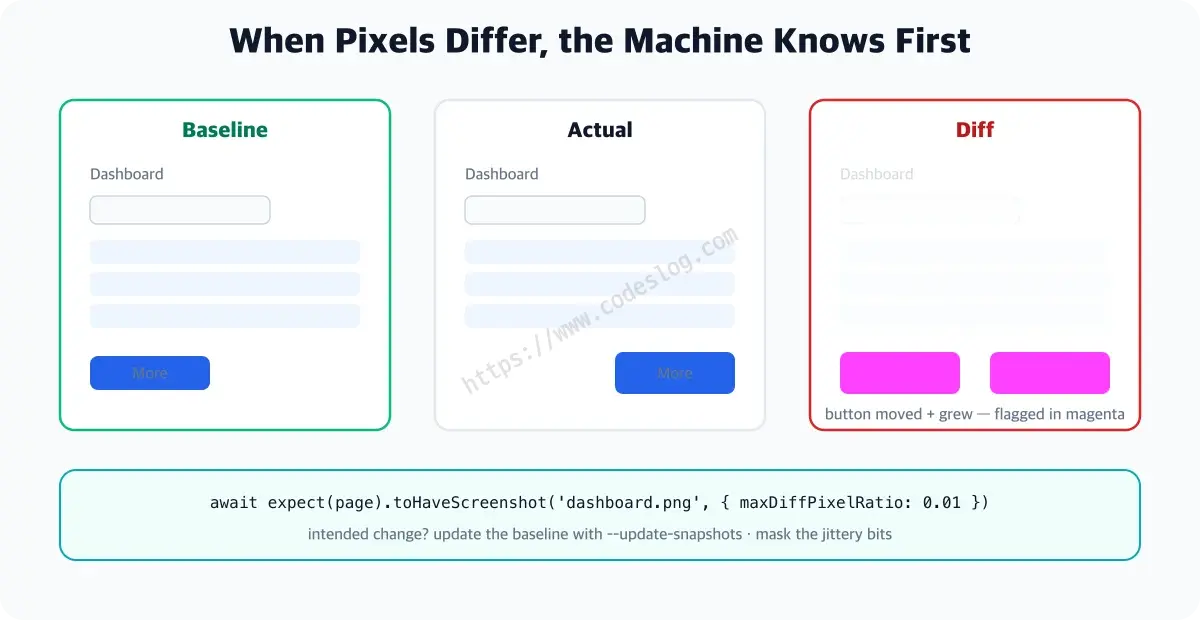
Not a bug. It means “no reference to compare against, so I saved the current screen as the baseline” (the -chromium-darwin suffix in the filename marks browser and OS — that becomes important shortly). Run again and it compares against that baseline and passes; from then on, the watch is real. A mismatch fails the test and leaves a diff image (changed pixels highlighted).
Let’s actually break it. Paint main a dark background and rerun:
  ✘  1 [chromium] › e2e/visual.spec.ts:3:1 › keeps the dashboard layout (794ms)
    Error: expect(page).toHaveScreenshot(expected) failed
      190833 pixels (ratio 0.21 of all image pixels) are different.

test-results/visual-keeps-the-dashboard-layout-chromium/
├── dashboard-expected.png   ← the baseline
├── dashboard-actual.png     ← the current screen
└── dashboard-diff.png       ← only the changed pixels, highlighted
A verdict of 190,833 differing pixels (21%), plus three images of evidence — baseline, current, diff. Open them side by side and the change is obvious at a glance.
The experiments turned up something interesting, too. Fading the list’s email color from #595959 to #b0b0b0 — a subtle change — passed. Pixel comparison has a second tolerance besides the count-based maxDiffPixelRatio: a per-pixel color distance threshold (threshold, default 0.2), and pastel-grade shifts don’t count as “different pixels.” Does that change sound familiar? It’s exactly the one axe nailed with a contrast ratio of 2.16 in the accessibility part. Different tools catch along different grains. Which is why we layer them.
Failure is the important moment. Look at the diff and make one of two calls:
- Unintended change → congratulations, you caught a regression. Fix the code
- Intended UI change → the baseline is just stale. Update it
npx playwright test --update-snapshots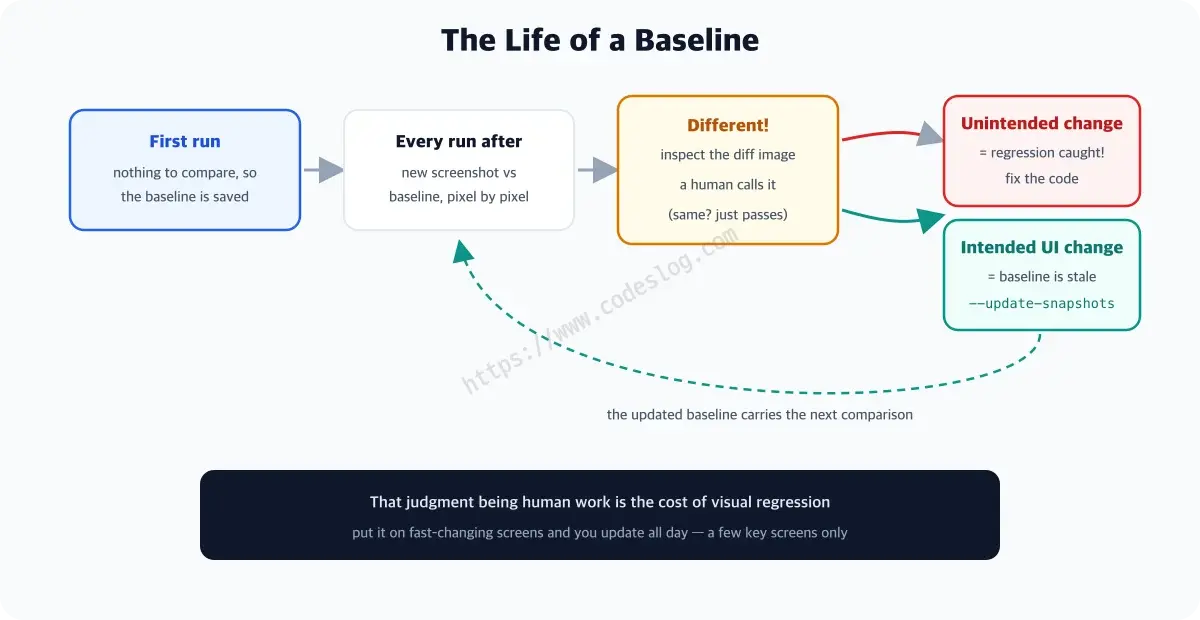
That call being human work — that’s the cost of visual regression. Hang it on a screen that changes weekly and you’ll spend your days updating baselines. The knack: put it on key screens that shouldn’t change often.
Shooting one element instead of the page#
Attach it to a locator rather than page and only that element gets cropped and compared. Shooting the whole page means one unrelated region changing turns the test red; shooting just the card you care about cuts the jitter sharply.
// baseline this one card, not the whole page
await expect(page.getByTestId('user-card')).toHaveScreenshot('user-card.png')
Going the other way, fullPage: true captures everything including what’s scrolled out of view. In practice, picking a handful of key elements is far cheaper to maintain.
Commit the baselines#
The first run drops reference PNGs into a visual.spec.ts-snapshots/ folder. Those files are part of the test — commit them like code so your team and CI share them. Skip the commit and other machines have no reference to compare against, so every run passes as if it were the first, and the regressions you built this for sail right through.
git add e2e/visual.spec.ts-snapshots/
git commit -m "test: add dashboard baseline"
Which means updating baselines (--update-snapshots) and committing the changed PNGs is one motion, not two. Reviewing those PNG diffs alongside the code has a nice side effect too: “here’s how the UI changes” becomes something the reviewer can see.
Shooting stable#
The three great shakers of snapshots: animation, time, random data.
await expect(page).toHaveScreenshot('dashboard.png', {
  animations: 'disabled',   // freeze CSS animations
  mask: [page.getByTestId('clock')],  // cover regions that change, like clocks
})
Data is already frozen thanks to the MSW mock — the network mocking part’s latest bonus. With a real API, every new user would rattle the screenshot.
The environment ambush#
Baselines differ by environment (OS, browser version) — font rendering above all. Compare a macOS-made baseline on a Linux CI and it fails almost every time. In practice, teams pick one of: (1) generate baselines in the same Docker image as CI, (2) a dedicated visual-testing service, (3) limit scope to a few key screens.
Curious about (1)? The official Playwright image does it. (New to Docker? Skip for now and start with (3).)
# generate baselines in the same (Linux) environment as CI
docker run --rm -v $(pwd):/work -w /work \
  mcr.microsoft.com/playwright:v1.61.0-noble \
  npx playwright test --update-snapshots
Match the version tag to your local @playwright/test (the demo repo is on 1.61). Snapshots made this way get a -linux suffix and compare cleanly on CI. This is why the demo repo’s CI doesn’t include visual tests by default (they’re for local practice).
One-page summary#
- Visual regression testing = checking what the screen looks like — when values (unit) and structure (E2E) are both fine, a layout wrecked by CSS is caught only here
- The mechanism is pixel comparison against a baseline screenshot — one
toHaveScreenshot('name.png'), and the first run saves the reference by failing on purpose - Attach it to
pagefor the whole page, to a locator for just that element — in practice, picking a few key elements is easier to maintain - Baseline PNGs are part of the test — commit the
snapshots/folder so CI and your team share them, and commit the changed PNGs whenever you--update-snapshots - On failure, three images remain (baseline, current, diff); if the change was intended, refresh with
--update-snapshots - Tolerance is two-layered: pixel count (
maxDiffPixelRatio) and per-pixel color distance (threshold, default 0.2) — subtle color shifts can pass, so leave contrast problems to axe - Pin down the three shakers (animation, time, random data) with
animations: 'disabled',mask, and mock data - Environment differences are the biggest ambush — macOS baselines vs Linux CI fail on font rendering alone; make baselines where CI runs (Docker)
- Don’t shoot everything — a few key screens is the sustainable scope
Handing the eyes’ job to the machine#
The toolbox is getting full. Next chapter: CI, where all of it runs automatically.
Getting a red CI over one font feels unjust — but that’s visual regression doing its job. (Make the baselines in the same environment, though.)
Level up: you can catch UI regressions that only eyes used to see.
Next up: building test and accessibility gates with GitHub Actions
Bumped into an unfamiliar term? The glossary has them all, one line each.
Leave a comment